Lets say you have a load balanced web application managed with OpsWorks – your application traffic will be addressed to the load balancer, but sometimes it’s still handy to address your application nodes directly for testing purposes or perhaps so each node has a unique SNS endpoint for HTTP notifications. You could just use their IP, but unless you use an EIP that IP address may change. You could create a DNS record, which would be easier to remember and allows the IP to change – but managing this manually would be a pain.
Fortunately this process of managing DNS records can be automated using Chef, Route53 and the EC2 instance
metadata functionality to obtain the public IP. Each instance will automatically create an A record for
[instance name].example.com on setup using their OpsWorks instance name.
Getting started
Firstly, I’ll assume you have a Route53 zone created – in my case the zone will be called example.com.
You’ll also need a set of AWS access keys, I recommend creating an IAM user restricted to managing your hosted zone.
You can use the following IAM user policy:
1 2 3 4 5 6 7 8 9 10 11 12 13 14 15 16 17 | |
Next add your AWS credentials and zone ID as custom JSON variables in your OpsWorks stack:
1 2 3 4 5 | |
Adding custom JSON to your stack is covered in more detail in Retrieving Files From S3 Using Chef on OpsWorks.
Finally, add the route53 cookbook to your Berksfile. If you’re not using Berkshelf you’ll have to clone the whole cookbook into your custom cookbook repository.
1 2 3 | |
Creating your recipes
Next, we need to create a custom cookbook and recipes – in this example the cookbook is called dnsupdate.
Create the following file structure and files in your custom cookbook repository:
1 2 | |
1 2 3 4 5 6 7 | |
1 2 3 4 5 6 7 8 9 10 11 12 13 14 | |
Substitute .example.com with your own domain. Net::HTTP.get(URI.parse('http://169.254.169.254/latest/meta-data/public-ipv4'))
is using the instance data API to obtain the public IP
– use the IP above any instance.
Adding recipe to life cycle event
Once you’ve committed and pushed the new recipe to your custom cookbook repository you’re ready to add the recipe to the configure life cycle event. First update your custom cookbooks, by going to your stack > Run Command > and selecting ‘Update Custom Cookbooks’ from the command select box.
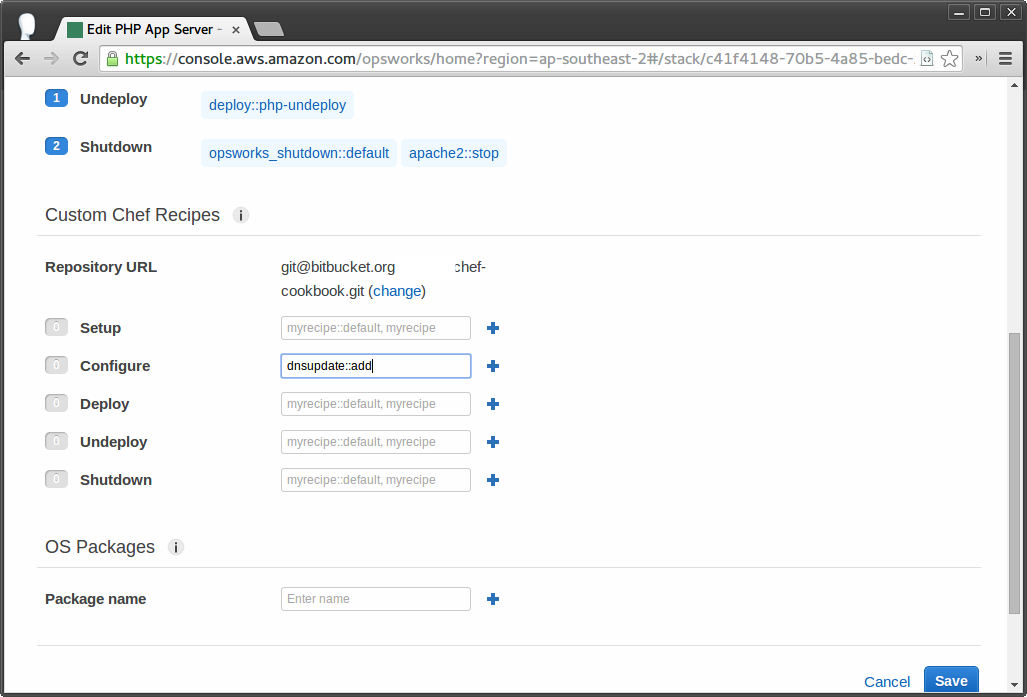
Finally, navigate to a layer in OpsWorks > Edit > Recipes > add ‘dnsupdate::add’ to the configure event and save.
Now when the run the configure event you should see a new DNS A record being added in Route53!